Connect With Us

Crosscol

zondag 22 september 2013

Flashback: the jar of eyeballs

This is a prop I made a few years ago for a Halloween party. Unfortunately, I don't have any pictures of the entire build, so I'll try to explain it as good as possible. Here's a list of materials I used:

  • Empty jar (I believe it contained pickles)
  • Pingpong balls
  • Hot glue gun
  • Acrylic paint
  • Glossy acrylic varnish
  • Images of irises, printed with a color laser printer
  • Fluorescent highlighter pen
  • Water
  • Syringe and needle
  • Fabric (pieces of an old T-shirt, I believe)
  • Short piece of rope


I started by making some veins on the pingpong balls with the hot glue gun. Next, I painted one side of the balls bright red, with some dark red for the veins. On the other side, I glued a printed iris. To make the entire eye as waterproof as possible, I applied a few coats of varnis. And it worked, because they have been sitting in water for a few years already and the paper irises are completely intact.

The eyes are in a jar filled with water, but of course they shouldn't float. I punched a small hole it them and filled them with water, using a syringe and needle. That way, they sink to the bottom. To make the water in the jar glow under a blacklight, I soaked the filling of a fluorescent highlighter pen in it. Works great!

I made two of these jars, each containing six eyeballs. To finish them, I put a piece of fabric over the lid and tied a piece of rope around it. I have used them several times, and people are always impressed by the effect.

zaterdag 21 september 2013

Tombstones, part 1

Here's the first part of my Halloween props series for this season. I'm gonna start with a few tombstones. They will be made from styrofoam, and coated with Monster Mud, a mixture of latex paint and drywall compound. I plan to build four regular tombstones and one cross. The stones will bear the names of horror writers: Mary Shelley, Edgar Allen Poe, Bram Stoker and H.P. Lovecraft.

Materials and tools
  • Styrofoam slabs (2 and 5 cm thick)
  • Liquid nails
  • Hot wire cutter
  • Adjustable power supply
  • Wood burning tool
  • Latex paint (cheapest kind, color doesn't matter)
  • Drywall compound
  • Paintbrush
The adjustable power supply is for the hot wire cutter. When I was building my Dwarven hammer, I just used batteries in it. The problem is, you can't really adjust the temperature of the wire. It mainly depends on the length of the wire. If you use a long cutting wire, for slicing through thick pieces, it doesn't get as hot as a short wire, and it becomes more difficult to cut. My cutting tool has a connector for a power supply, and I had an adjustable lab power supply lying around, wich works perfectly.

Getting started
I started with the four regular tombstones. I googled for some pictures to get get inspiration, and then I got started cutting and glueing together styrofoam. Here are a few pictures of Bram Stoker's tombstone in progress. I used a 5 cm thick slab of styrofoam for the tombstone itself, and 2 cm thick pieces for bevels and other details. The wings and skull details are made with a wood burning tool.


And here's a look at Edgar Allen Poe's stone. This one is a bit lower than the other ones. The finished stone will include, of course, a raven! A week ago I went to a costume store in Germany, where I found a cool looking prop raven.


Engraving
The tombstones need names on them. I engraved them with a wood burning tool, wich was quite difficult. The problem is, it gets very hot and melts through styrofoam in no time, so it's easy to ruin it! In fact, I almost did ruin H.P. Lovecraft's tombstone. I managed to solve this nicely, but first a look at the engravings that didn't fail.
I printed out the names, along with the dates, on a sheet of A4 paper. I wanted to transfer them to the styrofoam using carbon paper, but this doesn't work. It just doesn't show up. So instead, I copied it by hand using a marker, and then I got started engraving. To have at least a little bit of control over the temperature, I switched the burning tool on and off all the time. I think I managed to achieve a pretty decent result!


As for H.P. Lovecraft's stone, I damaged it a bit trying to engrave it. So instead, I cut out a piece of foamboard, printed out the text, copied it to a piece of cardboard and cut out the letters. Next, I glued them on the foamboard, so it forms a plaque with raised letters. It looks pretty good, but takes a long time, and sore fingers, to cut all letters! I also cut an Elder Sign from a piece of foamboard and glued it on the tombstone.


So that's it for now. In my next article, I'll talk about the cross and coating the styrofoam with Monster Mud.

dinsdag 17 september 2013

Halloween is coming!

With Elf Fantasy Fair behind us, it's time to get started on the next project: Halloween! I haven't had much time to prepare anything yet, so I'll have to finish my props in a record amount of time.
Me and my friends are part of a Halloween event in a local zoo. Every year, the weekend before Halloween the entire zoo is turned into a gigantic haunt. Last year I participated for the first time, but we didn't have enough time to build a decent set. This year, I plan to build a basic set that can be expanded year after year. It will be a graveyard, so the first thing I'm gonna make is a set of tombstones. Next, some sort of entrance. Luckily, the zoo has a collection of props we can use, so we'll see what else we're gonna need.
I will also publish my projects on Instructables, as part of their yearly Halloween contest. They give away some cool prizes, I hope I win someting!

zondag 15 september 2013

The Dwarven Helmet, part 2

In my previous post about the helmet, I talked about creating the shape and painting it. Now we're gonna continue where I left: adding the earpieces and neck protection.

The earpieces
I made the earpieces from foamboard, a very cool material to work with. It consists of a slab of foam plastic sandwiched between two layers of paper. I cut the basic shape out of it, the embossed details and glued them together. I also made the thingy that goes on the front of the helmet like this.


Painting was done the same way I painted other metallic-looking surfaces. A grey base color, shading with black and white, and a final finish with silver paint. Again, I forgot to take a picture...

Neck protection
Next up, the back of the helmet needed to be closed with some sort of neck protection. Gimli's helmet in Lord Of The Rings had a leather back, so that's what I used. I had some pieces of scrap leather lying around, and luckily they were big enough. I cut a piece to size (a bit too big, so I could trim it to exact size afterwards) and glued it to the inside of the helmet.


And then I got some help of my pal Herr Fritz! It's my girlfriends skeleton (well, not really her skeleton, but you know what I mean). She got it for school and it's been standing in our appartment ever since. Even though he would make a nice Halloween prop, we're never gonna use him for that because he was quite expensive. He's German, that's why we named him Herr Fritz.
I put the helmet on his head (with a towel underneath it, because there's a large bolt coming out of his skull) and glued the front piece to it. It's starting to look quite cool!

Attaching the earpieces
So now I had the helmet with the leather attached to it, all that was needed now was attaching the earpieces. I glued them to the leather, and to the helmet itself. I cut the excess leather away, and voila! It was ready just in time for Elf Fantasy Fair. Here you see the finished helmet modeled by Herr Fritz


woensdag 11 september 2013

The Dwarven Hammer, part 3

Introduction
In my previous post, I coated the styrofoam hammer with acrylic resin. Working with the resin was a lot harder than I thought, and I had to adjust my plans a little bit. The final result, however, turned out better than I expected!

Painting
I started by painting the entire hammer dark gray. I mixed a batch of acrylic paint, consisting of gray, some black to make it darker and some silver paint to give it a metallic effect (it didn't work, as it turned out later). I painted the entire hammer, except the two deep ridges, in this color. The deep ridges were painted gold.
I hoped the gray paint would have a metallic effect when dry, but as it turned out, it was just, well, dull gray! Mixing silver paint with regular paint didn't work. I had to find a different solution for this. But first, I applied some shading. For this, I used black and white paint and a sponge (no fancy, expensive artist-grade sea sponge, just the cheapest synthetic sponge you can think of). To make darker and lighter spots, I took a tiny drop of paint and rubbed it on the surface. I use this technique a lot to make nice surfaces that don't look like a single, boring color. I also drybrushed some black on all edges and ridges.
I still wanted a metallic effect, though. To achieve this, I rubbed some pure silver paint over the entire surface with a sponge. It turned out great! The base color hasn't really changed, but combined with the metallic finish, it actually looks like cast iron! And remember I said the surface wasn't as smooth as I had hoped? It's better this way, because this make the metallic finish stand out much better.


The handle
The hammer also needs a handle, of course. I made this with PVC pipe. The lower part will be covered in felt, and the upper part with cork, to make it look like a wooden handle.
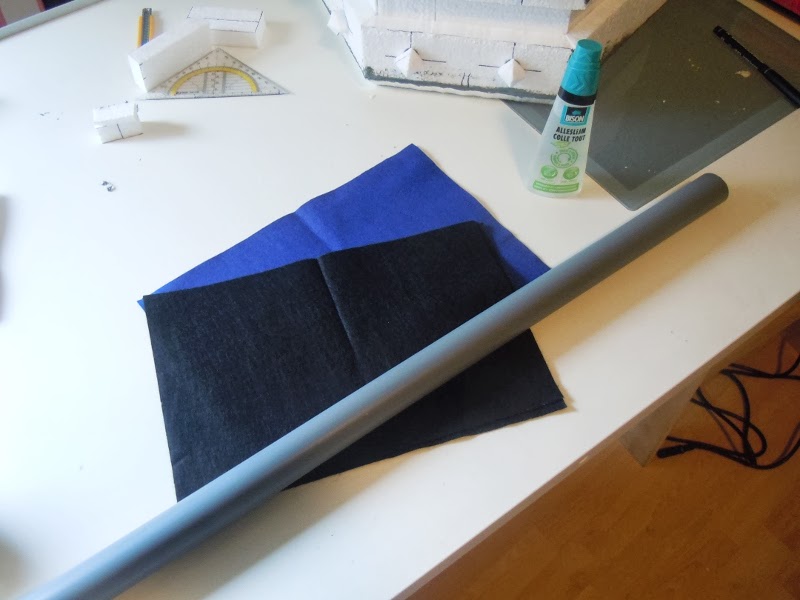
I started with the lower part. I had cut a piece of PVC pipe to length, ready to be wrapped. I used two different colors felt, black and blue. I cut strips from it and wove them in a checkerboard pattern, glueing them to the handle with general purpose glue. This took quite a while, but I think the result looks quite cool!


The end of the handle also needed something to finish it. I carved an endpiece out of styrofoam and coated and painted it in the same way as the hammer itself. Sorry for the blurry pictures.


The upper part of the handle is wrapped in this sheets of cork. I stumbled on this by accident in an art supply store and immediately realized this would be perfect for the handle! To make it easier to work with, I cut in in 10 centimeter wide strips and glued these to the handle. I secured them with tape while the glue was drying.


Sorry, there's only one picture of the handle in progress. When all the cork was in place, I gave it a thin coat of brown paint and then attached it to the hammer head.

Finished!
With the handle finished, I could finally glue it into place. I made sure everything was aligned properly, because once in place, it would be impossible to correct it. All that was left was finishing the connection with another strip of cork, and voila!


Even though the finished piece looks a bit different than what I had originally in mind, I'm quite happy about it. I expect to draw a lot of attention at Elf Fantasy Fair this year!

zaterdag 7 september 2013

The Dwarven Helmet, part 1

Introduction
My dwarf costume wouldn't be complete without a helmet, of course. I wanted to make a basic shape out of paper maché, and add more features to it using the styrofoam and acrylic resin technique I used for my hammer. My inspiration was Gimli's helmet in Lord Of The Rings. In fact, my helmet will be more or less the same.

The basic shape
I wanted to use paper maché and a balloon for the basic shape. I have used this technique in the past for creating masks. You take a balloon, inflate it to the right size and glue strips of paper maché over it. Next, you pop the balloon and you have a sturdy cardboard object.
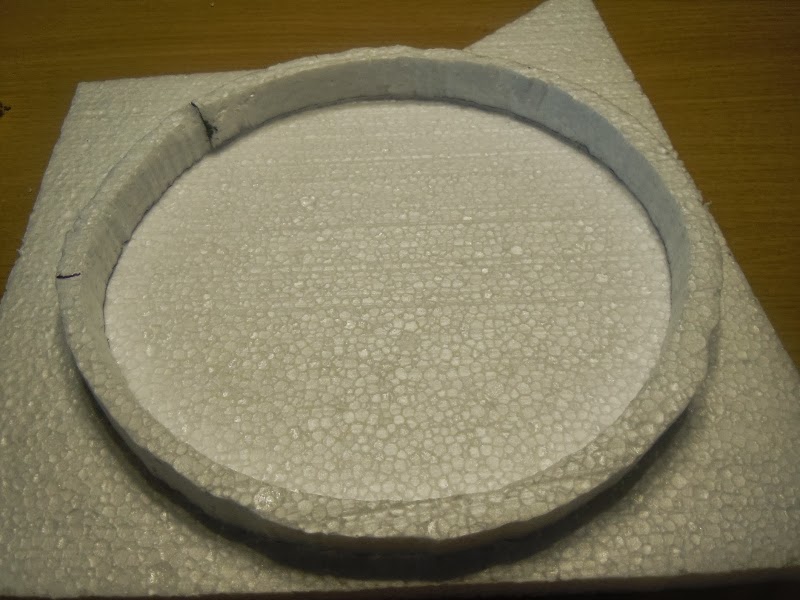
It didn't really work this time, though. I don't know it was the quality of the balloon I used, or the fact that it was insanely hot the day I did this, but after only one day the balloon was almost deflated! Usually, a balloon keeps its size for at least three or four days. Of course, because the glue was still wet, the shape was ruined. I realized this wouldn't work this time.
Luckily, I found a perfect alternative. In fact, this was a million times better: a steel mixing bowl! I had it lying around in my kitchen, and it turned out to be the perfect size for a helmet. The only thing I had to do was warp it a little bit into an oval shape so it would fit nicely.


Building up the helmet
So I had the perfect helmet base. Next up: cutting some styrofoam! I used my hotwire cutter and boxcutter for cutting various shapes and I glued them to the bowl with liquid nails. Great stuff, this will stick to just about everything! After that, I filled up all gaps with paper clay. Very easy to make, just soak shredded newspaper in water, blend it into a fine mush, squeeze out excess water and mix with wallpaper glue. I also add some salt so mold won't grow in it.


Next step: coating it with acrylic resin! This time it worked a lot better since I have some experience with it. I coated eveything, including the steel. Two layers were sufficient, and it didn't need sanding.


Painting
The outer parts were painted the same way I painted the hammer. A gray base color, shading with thin coats of black and white, and a final silver finish. The inner part - the steel bowl - is painted brown to resemble leather. This was a bit more difficult. I started with a uniform brown base color, and while still wet, I added some darker spots. Once dry, I used the sponge drybrush technique again to apply several layers of shading to achieve a nice finish.


The next step is adding the earpieces and neck protection. But that's for another post!

zondag 28 juli 2013

The Dwarven Hammer, part 2

Introduction
It's been a while since my last post, but here it finally is. Last time, I had a styrofoam hammer head finished and ready to get coated in acrylic resin. After coating it with the resin, I intended to put some Celtic knot-type patterns on it, but I abandonded this idea (I'll tell later why). Instead, I'll paint them on.

Working with acrylic resin
The resin came as a two component system, a milky liquid and a white powder. They have to be mixed in a specific ratio and then applied with a paintbrush. Since I didn't want to ruin a high quality paintbrush I bought the cheapest one I could find for this. I also ordered a small bottle of so-called "thixotropic compound", wich is used to thicken the mixture if it's too liquid, but I didn't use it.


The resin hardens quite fast, in about fifteen minutes it's already too thick to work with. Because of that, I always prepared small quantities at a time. Coating the entire head was an eight step process. I started with one end, then put it on its side and did all six sides, and by the time I was done, the end I did first had dried enough to put it upright and coat the other end. I gave it two layers of resin, wich should be sturdy enough.
One thing I learned while working with this stuff: it's not easy to use! First, it's a runny liquid and runs everywhere, and then it starts thickening. Drops than have run down solidify in place and are almost impossible to remove. The most difficult part where the rivet heads I put in place. While liquid, the resin tends to flow together around them, so I had to keep spreading it out with a brush until it had thickened enough.

Finishing
After the final layer had hardened, it was time to start sanding it to get a smooth surface. However, since the resin was so hard to work with, it was more or less impossible to get a smooth enough surface. Also, there were quite a few lumps and drops that I had to remove with a dremel.


So to put thing short, the surface isn't smooth enough for the next step I had in mind. I wanted to apply strips of thick cardboard to it to create Celtic knot-type patterns, but I'm afraid this won't work, and I don't want to risk ruining it. So the next step will be painting, and instead of the cardboard strips I'll paint some patterns on it.