When I started this blog in 2013, one of the first things I made was a set of tombstones. Now we're four years later, and the tombstones have been retired (read: smashes to pieces and thrown in a dumpster). In the meantime, my skills have also improved a bit, so it's time to build new ones!

I apologize in advance for the crappy photos. The lighting in my garage is horrible, and taking pictures of bright foam sheets is quite challenging!
Materials and tools
When I built my first stones, I used expanded polystyrene foam (EPS). The problem with this material is that it's very soft and fragile, it's the kind of foam that has all those nasty little white beads. Now I'm using extruded polystyrene foam (XPS), wich is harder and doesn't have those little beads. It's a lot easier to work with, especially for engraving text. With EPS, it's almost impossible. On my first stones, I used a wood burning tool, wich gets waaaay too hot; with XPS foam, you can use a Dremel.
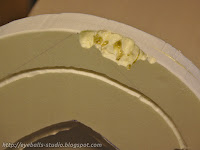
For glueing them together, I used a polyurethane based wood glue. This costs a bit more than regular white wood glue, but it's much stronger. PU glue slightly foams as it cures and fills any gaps. I tested it first on some scrap foam, to make sure it didn't dissolve it. Polystyrene is easily dissolved in many solvents, but apparently this glue didn't contain any of them.
So, without any further delay, here's the complete list of materials. It doesn't include painting supplies yet, that's for the next part!
I wanted my large stones to be the same size: 80 by 50 centimeters. The reason for this is that I'm also building a tomb that will serve as a storage box, and they have to fit inside. The remaining space will be filled with smaller stones.
I took out my sketchbook and started designing the large stones. At first, I printed some reference pictures of real tombstones, but eventually I ended up designing most of them from scratch myself. I didn't add too much details, most of them would be added on the fly anyway. I did keep the proportions and scale in mind, so it would be easier to transfer the designs to the foam plates.


One major flaw in my first stones was that I forgot something to keep them standing upright. I ended up using duct tape! This time, I'll glue a few pieces of PVC pipe to the back, so I can use sticks to keep them in place.
Basic shapes
With the designs ready, I got started on the basic shapes. Each stone consists of two panels of foam glued together, with the details carved into them. I first cut out the inside shape of the front panel, glued it to the back panel, and then cut out the entire outside shape of the stone. I don't know if this explanation makes much sense, I hope the pictures do a better job.


Next up, I cut some decorative profiles in some of the edges. I bought a new hot wire cutter, this one uses a much thicker wire that can be bent into shape. Mainly the inner edges got a profile cut into them. The outer edges were rounded by sanding with 80 grit sandpaper.

Besides 80x50 cm tombstones, I also made some 30x50 cm tombstones. I had already designed the tomb I wanted to use for storing and transporting the stones, and I had some space left. In total, I will make seven large stones and five small ones. The small tombstones will have names of children from horror movies (Georgie, Samara, Jumby, ...).

Carving details
The most important details were the names on the stones. I typed them on my computer, printed them and then needed to find a way to transfer them to the foam. Problem is, carbon paper doesn't work, it simply doesn't show on foam. However, simply taping the paper in place and tracing the letters with a pen worked fine. The outline was slightly carved into the foam and easily traced with a ball point pen.


For carving, I used a Dremel. If you want to do fine detail work, a flexible shaft is a must have. I hung the tool itself from a hook on the ceiling, so I could easily move the handle on the flex shaft around.


I started with a grinding stone to remove a lot of material fast from the letters, and then used a thin diamond engraving bit for carving out the exact shape of the letters. Medium speed is best for engraving foam; too fast and the foam will melt, and there will be globs of molten plastic in the letters.


I also carved some decorations out of foam scraps. For example, Jack Sparrow's tombstone got a Jolly Roger skull, and John Kramer's a puzzle piece.

Wear and tear
Of course, the tombstones should look old, damaged and worn. With styrofoam, the perfect way to do this is with a wood burning tool. I melted out large chunks of foam, and carved cracks in the foam.


Showcase!
Here are a few of my finished, unpainted stones. I tried to carve Beetlejuice's face in the stone, but he looks more like Doc Brown...


A few of the little ones:


The next step in painting, but that's for the next post!

I apologize in advance for the crappy photos. The lighting in my garage is horrible, and taking pictures of bright foam sheets is quite challenging!
Materials and tools
When I built my first stones, I used expanded polystyrene foam (EPS). The problem with this material is that it's very soft and fragile, it's the kind of foam that has all those nasty little white beads. Now I'm using extruded polystyrene foam (XPS), wich is harder and doesn't have those little beads. It's a lot easier to work with, especially for engraving text. With EPS, it's almost impossible. On my first stones, I used a wood burning tool, wich gets waaaay too hot; with XPS foam, you can use a Dremel.
For glueing them together, I used a polyurethane based wood glue. This costs a bit more than regular white wood glue, but it's much stronger. PU glue slightly foams as it cures and fills any gaps. I tested it first on some scrap foam, to make sure it didn't dissolve it. Polystyrene is easily dissolved in many solvents, but apparently this glue didn't contain any of them.
So, without any further delay, here's the complete list of materials. It doesn't include painting supplies yet, that's for the next part!
- 2 cm thick XPS foam plates
- 16 mm diameter PVC pipes
- PU wood glue
- Band saw with 24 tpi blade
- Hot wire cutter
- Wood burning tool
- Respirator
- Dremel with flexible shaft
- Grinding stones and diamond engraving bits
- 80 grit sandpaper
- Wood leftovers (plywood, melamine, ...)
I wanted my large stones to be the same size: 80 by 50 centimeters. The reason for this is that I'm also building a tomb that will serve as a storage box, and they have to fit inside. The remaining space will be filled with smaller stones.
I took out my sketchbook and started designing the large stones. At first, I printed some reference pictures of real tombstones, but eventually I ended up designing most of them from scratch myself. I didn't add too much details, most of them would be added on the fly anyway. I did keep the proportions and scale in mind, so it would be easier to transfer the designs to the foam plates.


One major flaw in my first stones was that I forgot something to keep them standing upright. I ended up using duct tape! This time, I'll glue a few pieces of PVC pipe to the back, so I can use sticks to keep them in place.
Basic shapes
With the designs ready, I got started on the basic shapes. Each stone consists of two panels of foam glued together, with the details carved into them. I first cut out the inside shape of the front panel, glued it to the back panel, and then cut out the entire outside shape of the stone. I don't know if this explanation makes much sense, I hope the pictures do a better job.


Next up, I cut some decorative profiles in some of the edges. I bought a new hot wire cutter, this one uses a much thicker wire that can be bent into shape. Mainly the inner edges got a profile cut into them. The outer edges were rounded by sanding with 80 grit sandpaper.

Besides 80x50 cm tombstones, I also made some 30x50 cm tombstones. I had already designed the tomb I wanted to use for storing and transporting the stones, and I had some space left. In total, I will make seven large stones and five small ones. The small tombstones will have names of children from horror movies (Georgie, Samara, Jumby, ...).

Carving details
The most important details were the names on the stones. I typed them on my computer, printed them and then needed to find a way to transfer them to the foam. Problem is, carbon paper doesn't work, it simply doesn't show on foam. However, simply taping the paper in place and tracing the letters with a pen worked fine. The outline was slightly carved into the foam and easily traced with a ball point pen.


For carving, I used a Dremel. If you want to do fine detail work, a flexible shaft is a must have. I hung the tool itself from a hook on the ceiling, so I could easily move the handle on the flex shaft around.


I started with a grinding stone to remove a lot of material fast from the letters, and then used a thin diamond engraving bit for carving out the exact shape of the letters. Medium speed is best for engraving foam; too fast and the foam will melt, and there will be globs of molten plastic in the letters.


I also carved some decorations out of foam scraps. For example, Jack Sparrow's tombstone got a Jolly Roger skull, and John Kramer's a puzzle piece.

Wear and tear
Of course, the tombstones should look old, damaged and worn. With styrofoam, the perfect way to do this is with a wood burning tool. I melted out large chunks of foam, and carved cracks in the foam.


A very important warning here, styrofoam releases very nasty fumes when melted or burned. This should only be done outside or in a well ventilated area, and you should definitely wear a respirator!
Keeping them in place
Like I said, my first tombstones weren't really stable. I did add some sort of base, but nonetheless the slightest breeze knocked them over, and I had to improvise with duct tape. This time, I took my precautions!
First of all, I cut 6 cm long pieces of 16 mm PVC pipe. I then carved a channel in a chunk of foam, put the pipe in it and glued it to the back of the stones, so I can use sticks to keep them up.


Second, I cut some strips of leftover wood and attached them to the bottom of the stones with glue and screws. This protects the base of the stones a bit, and makes them bottom heavy and thus more stable.

Here are a few of my finished, unpainted stones. I tried to carve Beetlejuice's face in the stone, but he looks more like Doc Brown...


A few of the little ones:


The next step in painting, but that's for the next post!


