It's been a while since my last re-cover of a paperback book. My previous attempt went ok, but not as good as I had hoped. In the meantime, I made a few more sketchbooks and I improved my skills. So a while ago, I bought a compilation of Lovecraft stories on Ebay and started working on a custom cover.

Materials
- The Haunter of the Dark & other stories
- 3 mm thick cardboard
- 1 mm thick cardboard
- Kraft paper
- Wax paper
- Book binding glue
- Box cutter
- Acrylic paints
- Gesso
- Linoleum
- Lino cutting tools
- Block printing ink and roller
- Decorative paper (for the end papers)
- Calligraphy pens
- Drawing ink
- Piece of scrap fabric
- Piece of string
- Embroiding thread and needle
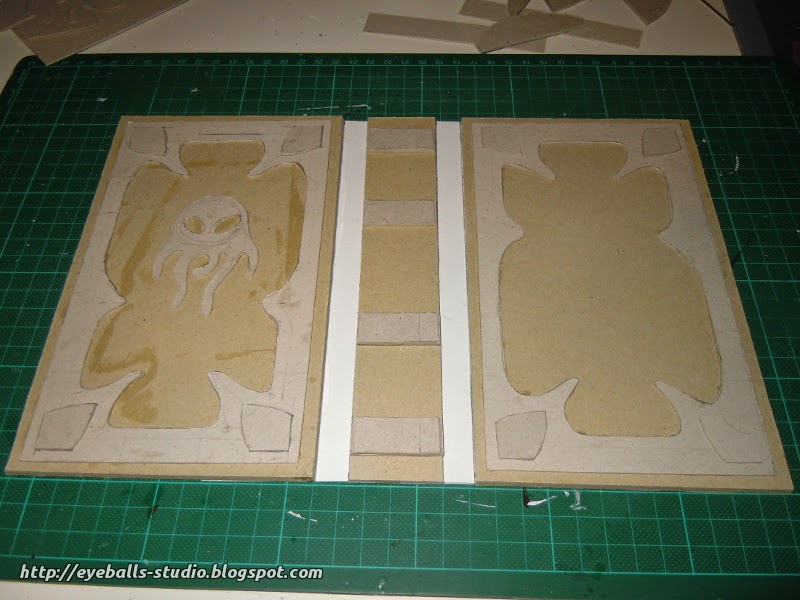
The cover is made using the faux leather technique I use on most of my books. I made an embossed bevel on the front and back, and some extra decorations on the corners. This time, the corners will be entirely covered in faux leather. On the back, I cut out a small cardboard Cthulhu. Nothing complicated, just a head with evil looking eyes and some tentacles.


New end papers
The book is stripped of its original cover, and new end papers are put in place. I didn't want to use plain boring end papers, though. The front end paper will bear the title and author, and the back end paper will bear another symbol associated with the Cthulhu mythos: the Elder Sign. Interestingly, the Elder Sign as it's usually depicted isn't the one Lovecraft himself invented, it's the version August Derleth came up with.
But first, the front paper. Like I said, it bears the title and author. Plenty of space here, so no need to scan handwritten text and scale it. I used a standard Gothic font, because first of all this is the font that's commonly associated with a horror theme, and second of all because I'm a complete noob when it comes to calligraphy and this is the only font I'm currently good enough at.
Before putting anything on the end paper, I practiced a lot. The text "The Haunter of the Dark" is written with a 3 mm wide pen, followed by "and other stories" with a 2 mm wide pen. On the bottom of the page, there's "H.P. Lovecraft". The most difficult thing is not the letters itself, it's keeping a consistent width and spacing.
Next, the back paper. For this, I tried something new: lino printing. I had bought a starter set a while ago and now I finally put it to use. The Elder Sign is simple enough for a complete beginner. Cutting it was easy enough, but the linoleum that came with the kit was very soft. It wasn't even real linoleum, it was some sort of rubber. For more detailed work, a harder type is definitely necessary. I made a few test prints on a piece of scrap paper, and then put it on the end paper. It looks quite ok, but the ink seems to take very long to completely dry.


Headbands
The first time I use these! With some book binding methods, the head bands are part of the binding and give the book additional strength. On modern bindings and paperbacks, they are purely decorative. And I've found a nice tutorial on how to make them yourself.
So I took a piece of scrap fabric, some string and red embroiding thread. I wrapped the fabric around the string, glued it together and started sewing the embroiding thread around it.


I glued two headbands to the spine of the book, followed by a piece of kraft paper over the spine and the end papers.


Final assembly
One thing remains: glueing the cover and the book block together! This is easy but requires precision. I put a piece of wax paper between the text block and the end paper, with some newspaper on top. Next, I brushed glue all over the end paper and then removed the newspaper. The waxed paper is for keeping the end papers from sticking together. The cover is then placed on the end paper and pressed firmly in place.


Finished
Here's the final result! Compared to my last attempt at turning a paperback into a hardcover, it looks pretty ok. It opens and closes easily. The head bands stick out a bit too much, and I should have made them a few millimeters shorter. Also, the cover should be a little bit wider and taller.


0 reacties:
Een reactie posten