After my first attempts at bookbinding, documented in this and this post, I decided it was time for another attempt! My first book didn't turn out so great. I made the hinge all wrong, and the book is almost impossible to open without tearing something. It would still make a fine prop for Halloween displays, so I'm not throwing it away.
What I did wrong
I already went wrong when measuring the book. I measured the height and width of the text block and added 4 millimeters for the height and 2 millimeters for the width. This would be the size of the front and back panel, so they would overlap the text block by 2 millimeters on each side. The panels shouldn't start at the spine, though, there should be a gap of about 5 millimeters. I made the hinge way too narrow, and the front and back panels too wide. Also, when measuring the spine panel, I just took the thickness of the text block, without taking the panel thickness into account.
Perhaps I'm not really making any sense, so I hope this picture explains it a bit better:
Second attempt
Okay, so I'm ready to give it another try, hopefully with better results this time. I'm not gonna go over the materials again, read my Necronomicon tutorial for that. The book I'm gonna work with is a collection of H.P. Lovecraft stories. The text block measures 19.7 x 12.6 x 2.1 cm. I wanted a 2 mm overlap again, but this time I took a 5 mm gap for the hinge into account, so the front and back panels are 20.1 x 12.3 cm. The spine panel measures 20.1 x 2.5 cm (the thickness of the text block plus 4 extra millimeters for the panel thickness).
Cover design
For the cover, I decided to try something else. Instead of the glyph, I made a title label. A simple glued on label wouldn't really look good, though, so I put a little more effort in it.
The cover has several embossed edges on it, and the label is set into it. For the title I used my mad calligraphy skills. Just kidding, I don't have mad skills, I'm a complete noob at it. After a lot of drafts I put the text on a sheet of paper with some sort of parchment texture on it, and glued it around a piece of thin cardboard.
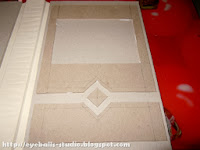
For the raised edges on the front cover, I used thin cardboard (the back of a notepad) and cut some shapes out of it. I glued them on the cover board, and assembled the cover. Like the previous time, I used the wrinkled kraft paper technique for creating a faux leather look. There's no kraft paper where the label goes.
After the glue dried, I painted the cover. First, a layer of black. This was followed by a layer of purple and then some lighter purple. I used a sponge for the final layer, so some of the darker colors show through in some spots. To finish, a layer of drybrushed gold paint.
End papers
The cover was one thing, the text block also needed new end papers. I cut off the old covers (and managed to damage a few pages in the process, nothing that can't be repaired luckily) first. I used the double endpaper technique this time. One paper was black drawing paper, and the second one the same type I used for the label, but a lighter color. Check out the tutorial for a complete explanation, I don't feel like repeating it here. I also used my calligraphy skills on the front endpapers, more or less the same as on the label.
When the end papers and mull had dried, it was time to put the book back together. This is the most nerve wrecking part of the entire process, because it requires precision and you can easily ruin it. But luckily, I managed to pull it off without too much trouble.
Finished result
When the glue had dried, I was pleased to find out the book opens and closes without any problems. It's a little stiff, next time I'll use different glue. The one I'm using now isn't very flexible when dry, I'm gonna get some actual book binding glue. I gave the cover a final layer of varnish, and voila!
The book will go on sale on Ebay in january. I'm too busy right now to handle things, but I'll post another update when it's for sale.


Geen opmerkingen:
Een reactie posten